My kids LOVE PlayDoh. I don’t.
I find that it is too sticky and if you push it into the crevices of some of the PlayDoh moulding tools, you can’t get it all out. Cleaning up after a PlayDoh session is a nightmare. Bits of PlayDoh stuck to the floor which you cannot vacuum off, and you’ll find pieces of it days after the play session has ended. Furthermore, it sticks to your hands and fingers and under the nails too! Yeah, I detest PlayDoh to the core, despite that fact that I know it’s a very good toy to keep the kids busy and at the same time, let their creativity run wild!
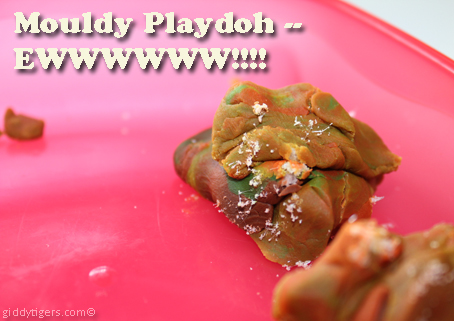
Plus just last week, I took out some of the PlayDoh I had stored away after a play session with the kids and discovered it had white stubs of MOULD growing on it!!!!

Uggh. Anything with MOULD growing on it is definitely a turn-off.
So I decided to MAKE my own PlayDoh. Can’t call it PlayDoh now, can I? So I’ll call it “Play Dough” 🙂

Besides being completely edible (perfect for toddlers who are in the early stages of putting everything in their mouths), this homemade Play Dough is very mouldable, does not stick to tools and fingers AND easy to make! I don’t recommend eating it, of course, but I’m just sayin’.
For Homemade Play Dough, you’ll need:
- 2 cups wheat flour
- ½ cup salt
- 2 tbsp cooking oil
- Water for moulding
- Food coloring (optional)
The guideline is to use about ¼cup salt for every cup of flour used. Salt is used as a form of preservative to prevent the PlayDough from getting mouldy. The cooking oil makes it stickier and gives a sort of sheen to the Play Dough.
Mix all ingredients together (except the food coloring), adding the water a little at a time. As you start to mix and knead the Play Dough, you will know what consistency you want to attain as you mix the water in. I did not use food coloring this time round, but if you want, just add food coloring in as required.

My kids LOVE my homemade PlayDough and ask for it all the time! I’m just glad to have found the perfect balance to make everyone happy. Besides being surprisingly easy to work with, and being NON toxic, it’s easy to clean up this homemade Play Dough too! If any of it is stuck in the tools just soak it in water for an hour or so and wash with water.

And after playtime, just store the Play Dough in a an airtight container for future use. No fuss, no mess!

Best of all, it’s easy to make and costs so much less!! 🙂
Updated on April 27 2012: I found a BETTER Playdough recipe: guaranteed squishiness!! 🙂


 Little Miracles
 Our Journey of Love
My kids love play dough too. But I hate the leftover smell on their hands and the cleaning part. Going to try it this weekend since it is so easy to make.
The Giddy Tigress says: Yes, I dislike the smell of PlayDoh too…it’s the chemicals they use I guess. Go try my “recipe” and see how it goes. Mine is guaranteed not to leave any stench! 🙂
Hi, sounds wonderful. Just curious, how do you store it ..room temperature? and how long can it last? Thanks:)
The Giddy Tigress says: Yes, I store it in room temperature. As for how long it lasts, I’m not really sure. But my daughter’s school uses the same recipe and as far as I know, they have been using it forever! 😛
I can relate to finding pieces of Play Doh after each play session. it’s even worse when some of it gets on the carpet!
Also I wonder how the Play Doh toys at the store never show the Play Doh colours all mixed up.
The Giddy Tigress says: Yeah! Kids like to mix up all the colors huh? We don’t have a carpet so it’s okay…but you could lay newspapers first before playtime? That could help, perhaps?
Pingback: Little Miracles · “Tried & Tested” Squishiest Playdough Recipe