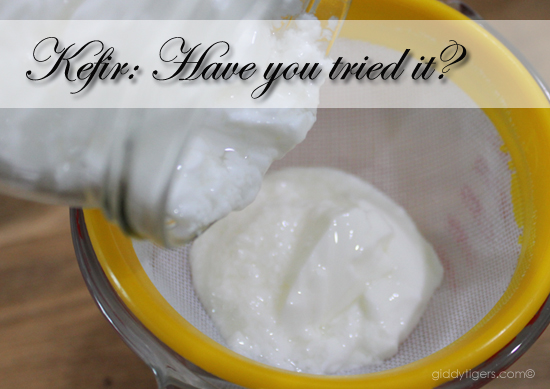
A little over three months ago, I started my kefir-brewing journey. I had done some research and many had reported that eating/drinking kefir had resulted in a healthier immune system and is nutritiously balanced to help treat sleep disorders, depression and even ADHD. There were also reports that because kefir cleanses the intestines and gut by providing healthy bacteria, it heals and cures eczema from within. Errr….hello? Anything that has a chance of curing my eczema, I’ll try, thank you very much 🙂
So I began brewing my own kefir with some kefir grains which a dear friend gave me…but more on the kefir brewing and cultivating process later.
Pronunciation
Firstly, let’s tackle the pronunciation of this kefir. Some pronounce it as “key-fur”, but I checked a few reliable sources and I’ve come to the conclusion that kefir is pronounced “ke-fear” (with the stress on the “fear”).
What is Kefir?
Kefir is a fermented milk drink which originates from the north Caucasus Mountains. Nowadays, kefir is prepared using kefir grains which feed on fresh milk. I have also read about water kefir and coconut water kefir, but I have only ever used fresh milk. In the States, I have seen kefir sold commercially in grocery stores but in Malaysia, I have yet to see them.
Kefir typically looks like a thickened milk or a slightly watery yogurt. Taste-wise, it is sour with a tinge of sweetness. Some describe it as slightly tart. If you know what fresh yogurt tastes like, the taste of kefir is not far from that.
The reason why kefir is gaining popularity is because it contains a whole host of friendly bacteria which is beneficial for our intestinal tract and gut. Think along the lines of probiotics…well, kefir is like that, but only way better. With a cleaner and healthier gut, the regular kefir drinker will definitely reap endless benefits in terms of a healthier body.
So What’s With The Grains?
Kefir is cultivated or brewed using kefir grains. Active kefir grains are shared or sold by kefir brewers and subsequently the brewing process is continued.
Kefir grains are a combination of lactic acid bacteria and yeasts in a matrix of proteins, lipids and sugars. You may have read that kefir grains resemble a cauliflower.
The wonderful thing about kefir grains is that they are ALIVE….as in they will keep growing and multiplying. So with just that one teaspoon of grains which my friend gave me, I will have a lifelong supply of grains and kefir, provided I take care of them properly.
Is Kefir for Everyone?
Drinking kefir is definitely beneficial for everyone. I suppose it is the taste that some people might find a little bit hard to stomach. It’s a tad sourish, but it doesn’t taste bad at all. If you add it into your smoothie, I guarantee you won’t feel it at all.
Apparently kefir is great for those who suffer from digestive problems, colon cancer, candida and also eczema and skin problems. It’s better than taking probiotics solely because kefir contains a whole range of friendly strains of bacteria, whereas probiotics only contain like 1 or 2. Kefir is also naturally produced, i.e. you brew and culture it at home, and you will always have enough provided you care for your grains and feed them well.
Since kefir grains feed on milk, I was initially concerned if kefir is suitable for people who are lactose intolerant. I was reassured when I read that the kefir grains actually feed on the lactose enzyme in the milk, and hence removing the lactose enzyme in milk; thus rendering kefir safe to be consumed by lactose intolerant folks.
They are also great for kids, if kids will take it, however, there’s always the option of adding it into smoothies for the enjoyment of kids. As for babies, I would think it’s better to wait till they are at least 12 months’ old. As always, start with a little amount to gauge the reaction first.
So What’s The Verdict?
Well, after drinking kefir for about three months now, I can say that my skin and hair condition has improved. While the eczema on my hands has not been cured completely, it is not getting any worse. Drinking kefir has also made my bowel movements more regular and I feel healthier on the whole.
There was once when I felt that I was about to come down with UTI, so I upped my intake of kefir and just overnight, I felt all better. Whenever someone in the family is not well, I will make him/her a smoothie with kefir in it and I will also take more kefir to help fight off the bad germs.
Besides, I really love the refreshing taste of kefir. My favorite ways to drink kefir is to mix it with some orange juice or mango juice to obtain a “lassi” kind of taste. Alternatively, I do take it mixed with equal amounts of water too. For a twist, you could also add some fruit to kefir for a nutritious snack.
I will continue taking kefir for my general health and hopefully, as time goes on, it will cure me of eczema for good.
Plus, what’s wonderful about kefir is that the grains will keep on growing and multiplying as long as they are fed. So as long as I keep on brewing kefir and taking care of my grains, they will last me forever.
Now Comes The Interesting Part….How Do I Make Kefir?
Making kefir (or brewing or culturing) is pretty straightforward. When you have everything ready, the only running cost for its preparation is the fresh milk.
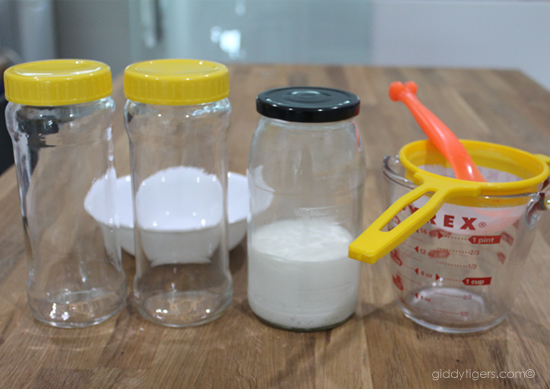
You will need:
- Kefir grains (get it from someone who is already a kefir brewer, or you can also buy it from kefir brewers online)
- Three glass jars with covers (enough to hold about 2 cups of water each)
- A small plastic strainer
- A plastic spoon
- A measuring cup
- Fresh Milk (any brand is fine, but don’t choose the Low Fat varieties, and NO UHT milk please)
- A small bowl to put your used utensils (optional)
Note: When handling kefir or drinking it, it is best to NOT use metal components. So make sure your spoons, cups, jars, bottles are all NON-metal. Apparently metal will deactivate the effects of kefir.
Directions
1. Start with: A jar of kefir grains fermented in some milk. If you had gotten a batch of kefir grains from someone, it would have been passed to you in this manner. Find out from that person when they started the fermentation process. You will need to strain your kefir about 18-24 hours after the fermentation process started.
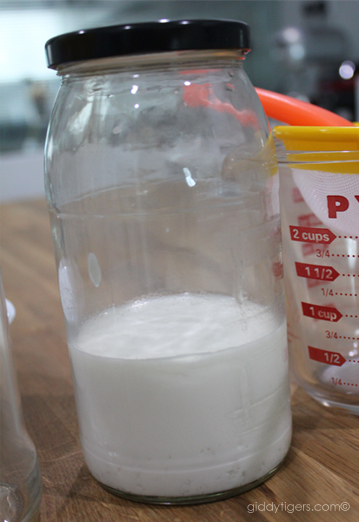
For example, if the milk was poured in at 10p.m., you would need to strain your kefir between 4p.m. – 10p.m. the following day, depending on the humidity of your area.
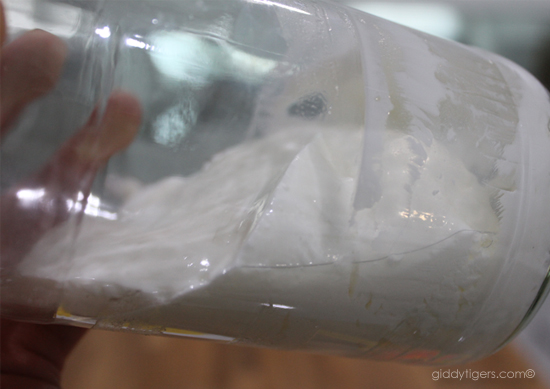
2. You will know when the kefir is ready to be strained when it resembles really really thick milk. I like to wait till it is of the consistency of soy bean curd, like so:
3. Carefully pour the contents into a strainer. Some of the watery parts will strain into the jar.
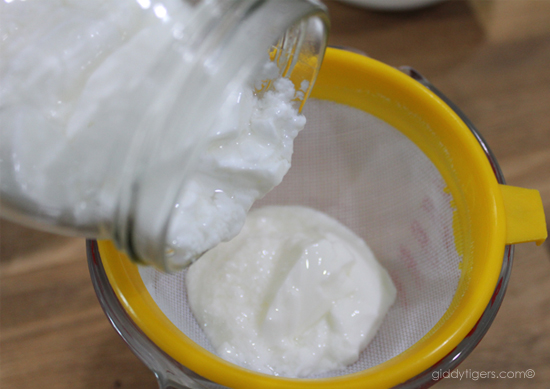
The thicker curd-like portion will remain primarily in your strainer.
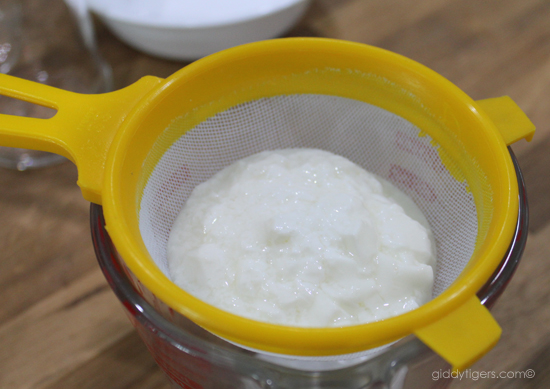
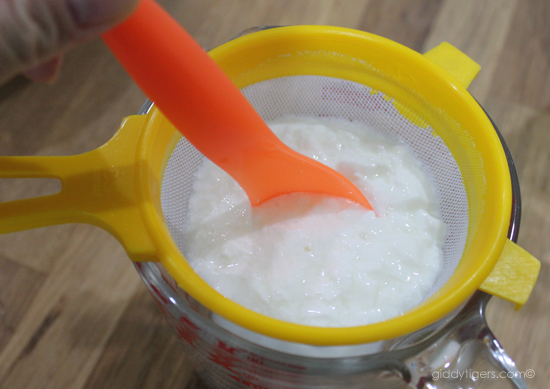
4. Using a plastic spoon, gently stir the curd-like mixture to ease the kefir down through the strainer. When it gets thicker, you may need to exert a little more pressure to ensure you get all your kefir strained out.
 5. Keep straining the kefir until you see the kefir grains (resembling cauliflower) in the strainer.
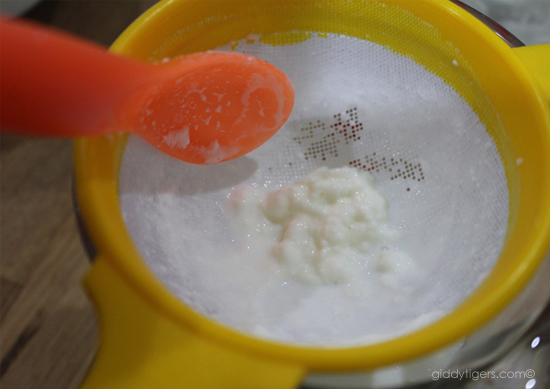
6. Pour the strained kefir into one of your clean jars. This is your jar of kefir which you keep chilled in the refrigerator. You can just keep on adding the kefir to it as and when you make it. There’s no need to wash this jar out every day. I wash mine maybe once every 2 weeks or so, but even then it’s not a requirement.
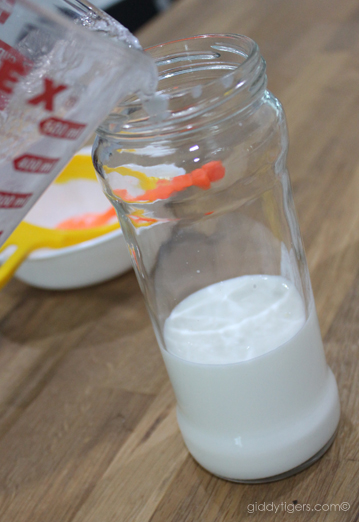
7. Scoop out the kefir grains from the strainer and put them into your other clean jar.
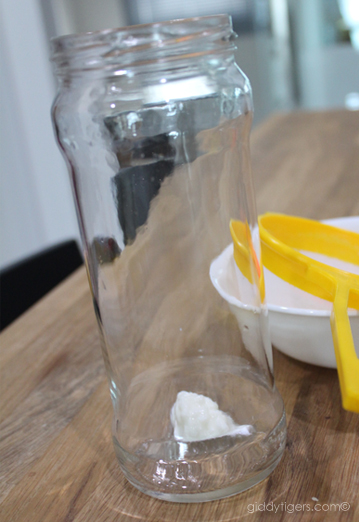
Measure out the milk and add it to the kefir grains. Take note that the milk should be chilled (i.e. from the refrigerator). Use approximately 1 cup milk to 1 teaspoon kefir grains.
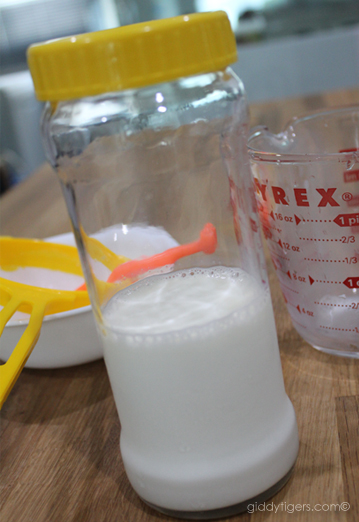 8. Leave this jar of kefir grains and milk out on the counter (or somewhere slightly warm) to ferment for 18-24 hours.
9. After 18-24 hours, repeat the straining process to obtain your kefir. After a few rounds of trial and error, you will be able to tell when you should strain your kefir to get your preferred taste. Some like it more sour, so they wait for longer periods, whereas others prefer a slightly sweet and tangy flavor, so they strain it sooner.
Note: At times, if you leave the kefir out to ferment for way too long, or if your room is too warm and the fermentation process happens really quickly, you will see that the kefir curdles and separates into two layers of curds and whey.
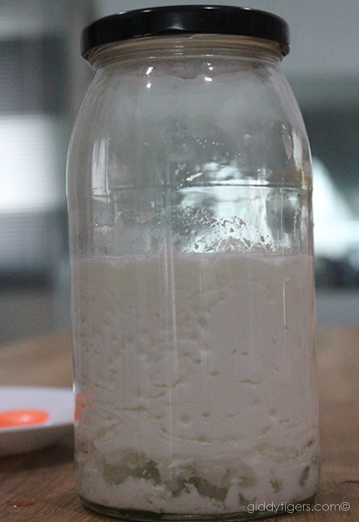
This is perfectly fine, and you just need to strain it as usual. Tastewise, this mixture could be slightly more sourish but it is still edible.
Pertinent Questions
Q: After I start brewing kefir, do I need to do it daily? What if I don’t feel like it, or what if I am travelling?
A: Sure you can take a rest! Just pour enough milk for your kefir grains and put the jar in the fridge. When chilled, the fermentation process does not happen, or happens really slowly. When you are ready to start brewing again, simply remove the jar from the fridge and place it on the counter. Start your timer for 18-24 hours.
Q: Since kefir grains will keep on multiplying, what do I do with the excess?
A: I eat them if I am not giving them away to someone. They taste chewy and I kind of like the texture.
Q: Does brewing kefir take up a lot of your time?
A: Nope, not at all. It takes about 10 minutes tops to strain the kefir and wash up, and sometimes I even get my kids to help me do it! It’s a great learning experience and I get to educate them about kefir too. 🙂
Q: Can I consume kefir straight? Or do I mix it with other stuff?
A: Yes you can consume it straight, but if you want to tame down the sourish taste, you can add a little water. I usually use a 1:1 ratio, but you can use whatever amount you like. I also mix it with fruit juices and in smoothies. Anything goes, as long as you remember NOT to mix kefir with hot liquids and beverages.
******************
Are you already on the kefir bandwagon and are you already making your own kefir? If so, good for you! I’d like to hear about how it has changed your life. I would say that taking kefir is definitely one of the best decisions I have made this year. I don’t regret it one bit.
Or if you have not tried kefir, are you curious to try making your own kefir now?


 Little Miracles
 Our Journey of Love
Thanks. I been searching about the kefir for long time and some time I m not really sure when it is ready. From your photos show and it built me the confidence. Thanks a lot!
The Giddy Tigress says: Thank you Lily! I’m glad my instructions and guide helped you. 🙂