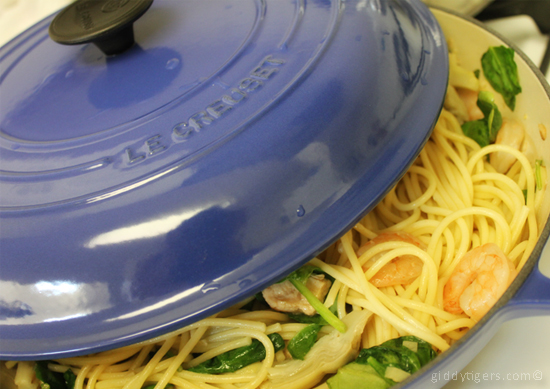
I’m a Le Creuset Virgin and I Need Advice

So… Le Creuset, eh?  Who knew? 🙂

We scored a 10-pc set of this marvelous French-made enameled cast iron cookware recently, at more than 50% off.  I think it was because it was a discontinued color, but that’s all right…we still think it looks fab. 🙂

I’ve been intrigued with Le Creuset cookware ever since I set my eyes on them…way before I even learnt they were cast iron cookware!  I’d admit I was drawn to them because of their pretty colors…I mean, how can I not be?  It certainly makes cooking more fun and cheers up the kitchen immediately.

But man, are they heavy!

I learnt about cast iron cookware a few months ago, and wanted to try cooking with them.  The thing that was holding me back was the cleaning portion.  So when I discovered that Le Creuset is essentially cast iron cookware, but because it’s enameled, we can clean it like regular cookware, and there’d be no “seasoning” of the cookware needed, I was yearning for them.

So anyway, the Le Creuset manual says that I cannot heat it up DRY.  Does that mean I need to pour my oil in it before heating it up?  That’s what I did yesterday when I made dinner.

I washed my Le Creuset braiser with soap and warm water, then I dried it with a kitchen towel.  Next I poured the olive oil into the braiser and swirled the braiser around to ensure the olive oil coated the entire base of the braiser, after which I turned on the stove on medium heat.  Did I do it right?  Does anyone have any experience with this?

Also, I read that Le Creuset isn’t too good for stir-frying.  It’s more for simmering because it keeps the food hot for longer periods of time.  Is that true?

Well in any case, hubby says the food tasted better…haha.  Not sure if it’s psychological or if it really does. 🙂

Posted in Close to Heart & Home, Drooling & Cooking | Tagged , , | 1 Comment

Eyebrow Threading: Do You Like It Like I Do?

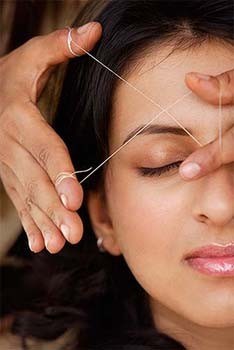
Source

I’ve wanted to try eyebrow threading for a long time.  When I was in the States several years ago, I noticed there were some stalls in malls offering this service, but somehow I could not find the time to get it done.

Thus far, I keep my eyebrows in shape by plucking and tweezing stray hairs after I have them waxed off.  It works for some time, but I was curious to find out how different eyebrow threading is.

The art of eyebrow threading has long been practiced in the Middle East, India, China and Persia.  In ancient Persia, threading was an indication that a girl had reached adulthood.  However, eyebrow threading has been gaining popularity in the West as well in the recent years.

Eyebrow threading is apparently recommended for those with sensitive skin because unlike waxing, it does not involve stripping off a layer of cells from your skin…well, somewhat.  Eyebrow threading is done by twisting two strands of cotton thread in such a way that it grabs the hair and pulls it from the follicle level, row by row.  Yes, it does sound a tad painful, right?  But trust me, it’s not. 🙂

I had the chance to try eyebrow threading out for myself today.  I called up a well-recommended salon nearby, and they told me it would take all of 5 minutes to have my eyebrows done.  Well, 5 minutes works for me, because I would be having a 3-month old baby along with me, so the quicker the better! 🙂

Continue reading

Posted in The Fairer Sex | Tagged , , , , , | Leave a comment

I Had A Mole Removed

I had it done not because of beauty, but because it was a necessity.

Several weeks ago, I visited my dermatologist and she asked me about a tiny mole she’d notice on my chest.  I told her it did not bother me, because it was so tiny (I think it was only about 1mm in diameter) and I didn’t even remember when it appeared, plus it wasn’t raised at all.  She told me the fact that it wasn’t raised was a concern, because based on the shape and color of the mole, she was worried it could be something more dangerous than just a mere mole.  So she suggested getting a skin biopsy done.

I told her the mole had been there for as long as I could remember and I asked if a biopsy was really necessary, but she insisted and said that it was important to check the cells to make sure it wasn’t melanoma.  I told her I was prone to keloids, so she said she would only scrape off a very superficial layer of skin for the biopsy.

After a week or so, my dermatologist called me with the results of the skin biopsy.  She told me my mole was something called a dysplastic nevus, or also known as an atypical mole.  A  dysplastic nevus is a pigmented skin lesion that has some atypical cells.  While mine was a benign one, there was 50% chance of atypical moles developing into melanoma.

Melanoma is a malignant tumor of melanocytes.  Melanocytes produce the dark pigment melanin, which is responsible for the color of skin.  Melanoma is less common than other skin cancers.  However, it is much more dangerous if it is not found early.  If melanoma is found early, while it is still small and thin, and if it is completely removed, then the chance of cure is high. The likelihood of the melanoma coming back or spreading depends on how deeply it has gone into the layers of the skin. (Source)

My dermatologist recommended that I have my mole removed in its entirety as soon as possible, so I did.

Continue reading

Posted in Close to Heart & Home, The Fairer Sex, Thoughts & Scribblings | Tagged , , , , , , | 1 Comment

Go Natural with Badger Sunscreens for Protection and Peace of Mind

Last year, I purchased a tube of sunscreen from Badger for my kids.  After reading EWG’s Guide to Sunscreen, it was clear that Badger produces one of the safest sunscreens around.  It came with broad spectrum UVA and UVB protection, had excellent stability under the sun and it contained only zinc oxide as the active ingredient, which made it a physical sunscreen.  Using a physical sunscreen on kids was important to me, because I did not want to run the risk of chemicals absorbing into my kids’ skin.

The Badger sunscreen I purchased last year was Badger Baby Sunscreen SPF34 in Chamomile & Calendula.  Upon using however, I found the consistency very thick and slightly oily.  Although it provided excellent coverage, my kids did not really like the strong smell from the sunscreen upon application.  Granted it wasn’t sticky and greasy, but the initial smell from the sunscreen was a slight put-off.  Also, its thick consistency did not allow the sunscreen to glide on the skin as easily as I would have hoped, a factor worth considering since I need to be time-efficient in the mornings when getting both kids out and ready for school.

However, I kept using this sunscreen because I loved it for the peace of mind it gives me.  It’s a great sunscreen with organic ingredients that I know are safe to be used on my kids, whilst providing them with the sun protection they need.  Of course, an added bonus is that it contained ingredients which I am not allergic to, and we ALL know how sensitive my skin is, right?  It’s only apt that I use a sunscreen on my kids that I am not allergic to, since I am the one doing all the sunscreen application on them!

I secretly hoped I would be able to find another sunscreen with all the benefits of this Badger sunscreen though, but without the strong smell and with a thinner consistency.

Well, my prayers were answered when Badger recently was kind enough to provide me with their latest range of sunscreen protection for kids and babies.  I was delighted to find out that they have since changed their formulation from the one I had purchased and have also included a sunscreen lotion to the mix.
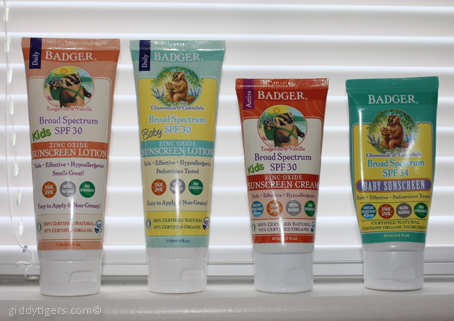
These are the sunscreen lotions/creams I was provided with for consideration:
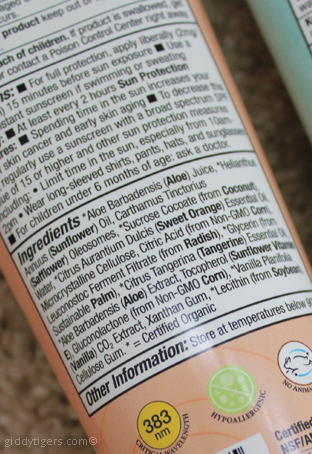
All of Badger’s sunscreens had been reformulated to be much lighter, less greasy and easier to apply.  They are now Sunflower Oil based as opposed to Olive Oil and they have NO Cocoa or Shea Butters weighing them down.
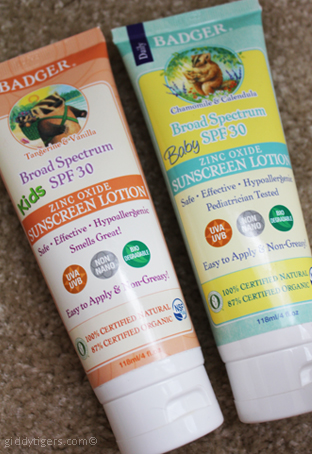
At a glance, the green tubes are for babies and the orange tubes are for kids.  However, both can be used interchangeably albeit they smell different, oh..and the green tubes come with a label that says “Pediatrician tested & approved safe for babies”.  It must be stressed that sunscreens are to be used on babies aged 6 months and over only; under 6 months, either limit the time baby is in the sun or get advice from your pediatrician.

The sunscreen lotions (taller tubes) are for everyday, non-swimming use, whereas the thicker sunscreen creams are made especially for use in the water.

The orange sunscreen tubes (for kids) are Tangerine and Vanilla flavored, and the green tubes (for babies) are Chamomile and Calendula flavored.  I’ve tried both of these on my kids and hands down, they prefer the Tangerine and Vanilla scent, as do I.  It’s a bit like applying orange ice cream on your body, if you may. 🙂  It doesn’t contain any hint of that chemical-like sunscreen smell which I detest.

The sunscreen lotions are runnier in texture compared to the creams, but both go on extremely easily.  I’ve even used them on my face and I did not feel the sticky, greasy feeling at all.  Here’s a quick pictorial comparison of what each of these sunscreens look like on the skin.
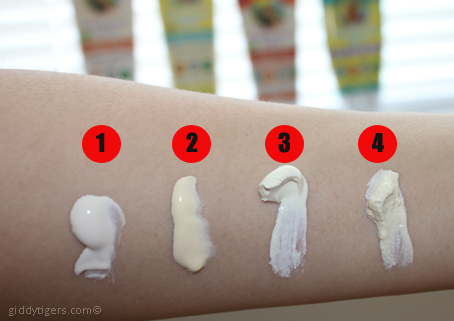
1. Kids Sunscreen Lotion SPF30 (Tangerine & Vanilla)
2. Baby Sunscreen Lotion SPF30 (Chamomile & Calendula)
3. Kids Sunscreen Cream SPF30 (Tangerine & Vanilla)
4. Baby Sunscreen SPF34 (Chamomile & Calendula) (discontinued and reformulated)

You can see that the creams (3 and 4) are thicker, whereas the lotions are smoother.  The chamomile and calendula formulations also show up a little more yellowish compared to the tangerine and vanilla one, but both absorb to almost nothing on the skin.  Also, note the difference in texture between the new formulation of the cream (3) and the old formulation of the cream (4).  It’s obvious that the greasiness has been reduced substantially, while maintaining the effectiveness of the sunscreen.  The old formulation looks a little “curdly” too.  Awesome job on reformulating these sunscreens, I’d say!  I love them!

On that note, I am also pleased to say that these sunscreens leave close to nothing, if not nothing on the face/skin after application.  So even though it is a zinc oxide sunscreen, we do not get the characteristic of that “whitish cast” after application.  This makes it good to apply on the face under makeup too!  Yay! 🙂
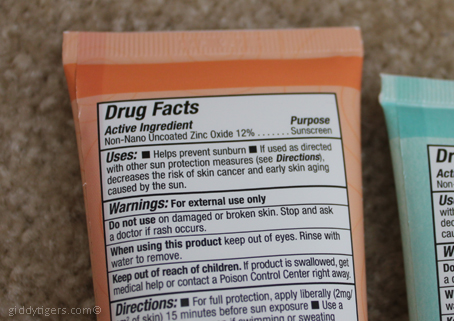
As a matter of fact, the active ingredient in Badger sunscreens is uncoated, non-nano zinc oxide.  This is where the peace of mind comes in, for although Badger sunscreens leave no whitish cast, almost none, depending on how fussy you are, it consists of non-nano zinc oxide, which means there are NO nano particles which will potentially be absorbed into the skin.

I’d recently discussed the concern of nano particles in zinc oxide sunscreens, and I am very happy that Badger sunscreens somehow managed to formulate an excellent sunscreen that does not pose that concern.  Continue reading

Posted in Parenting & Motherhood, The Fairer Sex, Thoughts & Scribblings | Tagged , , , , , , , | 2 Comments

Gỏi Cuốn: Simply Healthy, Seriously Addictive

It’s a known fact that I love my Vietnamese food: I can wax lyrical about a steaming hot bowl of phố, a delicious-tasting Bánh Mì or some steamed rice with a heartwarming bowl of   Bo’ Kho.  But the best appetizer I could ever have to precede a scrumptious Vietnamese meal would have to be the Gỏi Cuốn.  Some call it the summer roll, or fresh spring roll or salad roll, but it really is an addictive appetizing snack.  Toss it into the creamy peanut-flavored sauce and it’ll have you hooked for sure!

Enjoying the Gỏi Cuốn is an acquired taste; I did not enjoy it the first time I had it, but it has grown on me for years, and now I absolutely love it.

I decided to try my hand making it just the other day…I made it for my lunch and sent my hubby a picture of what I made. LOL!  Oh, don’t worry, I wasn’t all that mean…I made a second and third batch for him in the evening too!

Surprisingly it was pretty easy to make, and fun too!  Thankfully, my little baby decided to behave that morning so I had some time to prepare the ingredients, wrap the rolls and mix the dipping sauce too!  I would add in bean sprouts the next time round though, for that extra crunch.

I referred to separate recipes for the rolls and the peanut dipping sauce, because some of the dipping sauces were made from fish sauce and not the peanut ones that I like.

Gỏi Cuốn (Vietnamese Summer Rolls)
~Recipe adapted from Sunday Nite Dinner~

Ingredients:
(Amounts are approximated depending on how many rolls you wanna make)

  • 1 tsp salt
  • Medium-sized shrimp, peeled and deveined
  • Pork tenderloin
  • Thin rice vermicelli noodles
  • Lettuce, washed
  • Mint leaves
  • Basil leaves
  • Bean sprouts, washed
  • Rice paper (Banh Trang)
Directions:
  1. Fill a small saucepan half full of water, add salt and bring to a boil over high heat. Add the shrimp, reduce heat to simmer for 2-3 minutes or until cooked through. Do not discard water. Remove the shrimp with slotted spoon and set aside to cool.
  2. Trim fat from pork and return water to a boil. Reduce heat and poach pork in water at a low simmer, about 15-18 minutes or until cooked through. Remove pork and set aside to cool. Reserve light stock to make peanut Hoisin sauce.
  3. Follow package directions and cook rice vermicelli noodles.
  4. Lay shrimp flat and cut in half horizontally. Cut tenderloin in half lengthwise. Then cut across the grain to create thin slices of pork. Set shrimp and pork aside.
  5. Fill a medium bowl with warm water and quickly dip and spin a piece of rice paper into water; make sure to wet the entire piece. Lay it down on a cutting board. Place a lettuce leaf at the lower end of the rice paper. Add rice noodles, pork, mint, basil and bean sprouts evenly across the rice paper.
  6. Roll the rice paper over the filling and tuck it underneath. Add shrimp with the sliced side facing up. Fold the sides inwards and continue rolling while keeping tension on the rice paper for a tight roll. The roll will seal itself.
  7. Repeat steps 5 and 6 until shrimp and pork are finished off. Serve with peanut Hoisin dipping sauce.

Peanut Hoisin Dipping Sauce
~Recipe adapted from Little Corner of Mine~

Ingredients:

  • ½ cup water (you can use the stock from the summer rolls preparation above)
  • 4 tbsp chunky peanut butter (you can also use creamy peanut butter with some chopped peanuts for garnishing, but I used chunky peanut butter because I was too lazy :P)
  • 4 tbsp Hoisin sauce
  • 2 tbsp sugar

Directions:

  1. Mix all ingredients together, either with a spoon or using a blender.
  2. Store leftovers in the refrigerator.

We simply love this fresh-tasting appetizer and snack and like I said, I’d probably add fresh bean sprouts next time round.  You could also add coriander leaves, sliced cucumber or spring onions.  A few julienned pieces of carrots in the dipping sauce would also add a delightful color and taste to this dish.

Are you a fan of the Gỏi Cuốn like me?

Posted in Drooling & Cooking | Tagged , , , , , , , , , | Leave a comment