Food Waste Friday: Success and Mooncake Boxes

Today (and hopefully every Friday), I’m joining The Frugal Girl and other bloggers out there in posting my food waste photos within the past week, calling it Food Waste Friday.  It is hoped that by sharing pictures of the food I have wasted, it would motivate me to reduce wastage as much as possible.  I will try my very best to participate each week, and hopefully there will be weeks where I will be able to happily report that there was 0% wastage! 🙂

I thought I was done for this week and that I would be shaming myself in front of the whole world with my food wastage for the week, but when I checked and double-checked, I really had no waste at all.

The packet of thyme leaves I thought would have turned bad still looked all right (think I’ll be using them for roasted vegetables next week).  The golden sweet potato buns I made did not constitute waste, I thought, since I had frozen them in the freezer.  And the sole lemon I had in my fridge, I’m putting slices of ’em in my drinking water…love it!

So I am proud to say that there is no waste this week.  Yay me! 🙂

mooncake1

I did want to show off the mooncake boxes I had collected this year though.  The Mooncake Festival date proper will be on Monday, and these boxes came with every 4 mooncakes we bought.  Depending on the brand of mooncake, you get a different and unique design each time.  I’ve always found these boxes so intricate and pretty to look at, and I wanted to be sure I kept them just in case I want to use them to organize stuff later.

mooncake2

So far I have used some pretty mooncake boxes to store my kids’ jigsaw puzzle pieces and collectors’ cards.  I’m still undecided as to what to put in these boxes I’ve got this year.

mooncake3

Of course, collecting these beautiful boxes aren’t the only fun thing to do.  Eating these sweet mooncake delicacies in a variety of colors was also a sweet, sinful yet yummy affair!

mooncake4

Posted in Drooling & Cooking, Thoughts & Scribblings | Tagged | Leave a comment

My Pretty White Blooms!

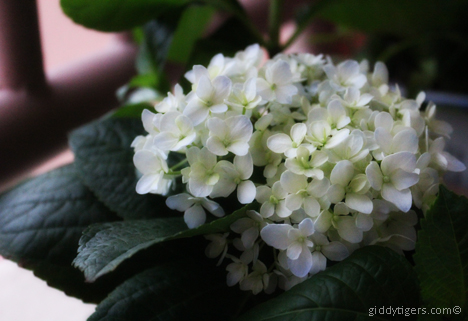
Everyone…say hello to this little addition to my home: beautiful blooming white hydrangeas!

hydrangea1

My aunt gave this pot to me a few days ago, and I am determined as ever to NOT kill it. 😛  My fingers aren’t very “green” to begin with, so this is a HUGE responsibility on my shoulders right there…

I was told that hydrangeas stay in bloom for up to 3 months!  Well actually I was surprised to see it white, because I had expected blue ones, but my aunt tells me that if I want the color to change to blue, I need to put some nails in the soil.

This was new to me, but I googled it up and found that the color of hydrangeas can be changed by altering the acidity of the soil it grows in.  Soil which is slightly acidic will favor blue hydrangeas, whereas soil which is slightly alkaline will produce pink hydrangeas.  I’m assuming though, that neutral soil will keep the hydrangeas white.  To make the soil acidic, we are advised to add some aluminum to the soil in the form of aluminum sulphate (Source).  But since I do not know where to get this, I chose my aunt’s method, and added some nails to the soil.

I’m not sure if the nails are made of aluminum or iron, but with what’s left of my chemistry knowledge, I’d say that any metal will be oxidized into a suplhate compound in the soil, which will then render it acidic.

Anyhow, I will post updates if/when I notice a change in color.

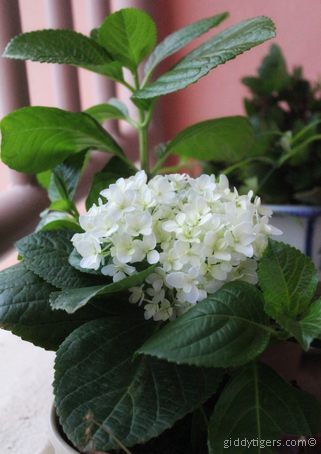
Meanwhile, I’m enjoying these pretty little things 🙂

hydrangea2

Posted in Close to Heart & Home | Tagged , , , | 3 Comments

A Miserable Failure at Giddy Cross Buns

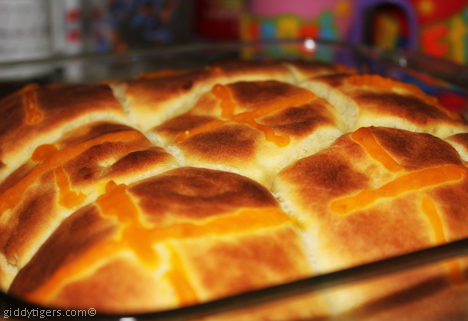
… or otherwise known as Golden Sweet Potato Buns.

golden

I tried my hand at this yesterday and although the taste was great, it felt a bit *heavy* 🙁  Any chance anyone knows what went wrong?  Or am I going to get *heavy* breads and buns every time I knead the dough with my hands as opposed to an electric mixer?  Its texture is not the light fluffy texture I would expect and we all know texture plays a really important role in the overall taste.

So this made 9 buns and 3 buns have gone into our tummies.  The remaining 6, I’ve put them into a container and frozen them.  For now, at least.  Until I think of how to make eating them more palatable.

I modified the recipe from AllRecipes.com, but on hindsight, I could have and should have made it shinier by egg-washing it before I baked them.  Not that that would have helped the texture though.  Anyway, homemade is still healthier… 🙂

Golden Sweet Potato Buns

Ingredients:


  • 1 (.25 ounce) package active dry yeast
  • 4 tablespoons white sugar
  • 1/2 cup canned sweet potato puree (I made my own puree by dicing the sweet potato, steaming it and mashing it up, adding some milk to make it smoother)
  • 1/2 cup warm water (110 degrees F/45 degrees C)
  • 3 tablespoons margarine or butter, softened
  • 1 teaspoon salt
  • 2 eggs
  • 3 1/2 cups all-purpose flour
  • Custard mix (Optional – omit this if you do not want any design on the top of the buns)

Directions:

  1. Dissolve yeast, warm water, and 1 tablespoon sugar in a mixing bowl. Let stand 5 minutes.
  2. Add remaining sugar, sweet potato, butter or margarine, salt, and slightly beaten eggs. Stir to mix well. Stir in 3 cups of flour. Turn out on a lightly floured surface. Knead 2 to 3 minutes, adding just enough of remaining flour to prevent sticking. Do not knead too heavily; when smooth, shape into a ball. Place in an oiled bowl, and turn to coat the surface. Cover, and let raise about 1 hour or longer.
  3. Punch down, and allow dough to rest for 2 minutes. Divide into 9 balls, and place on a greased cookie sheet or in a baking pan. Allow to rise until doubled.
  4. Make a smooth custard paste using the instructions on the custard mix.
  5. Pipe the custard on the buns in any design you like.
  6. Bake at 375 degrees F (190 degrees C) for 12 to 20 minutes. Serve warm.
Posted in Drooling & Cooking | Tagged , , | 2 Comments

The Dish with a 50:50 Verdict

Last week, I wanted to use up as much as possible of  the stuff I had in my fridge, and I saw this pack of fresh thyme.  I had only used thyme to roast vegetables with and did not know what to do with the rest of it, so I decided to try baking some chicken.  I could not get any chicken drumsticks from the wet market, so I went with chicken wings instead.  I also used lemon and some other regular condiments to season the meat. I had wanted to marinade it for a few hours in the fridge, but that day we decided to dine out for dinner.  And the next day we were also out the whole day, so my chicken wings were sitting in that marinade in the fridge for a good TWO days!

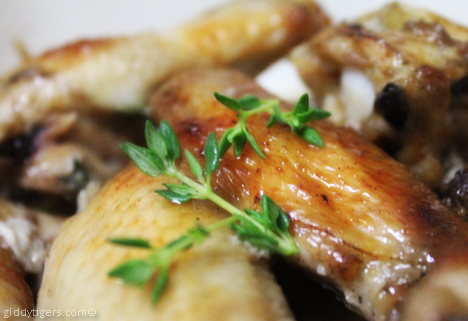
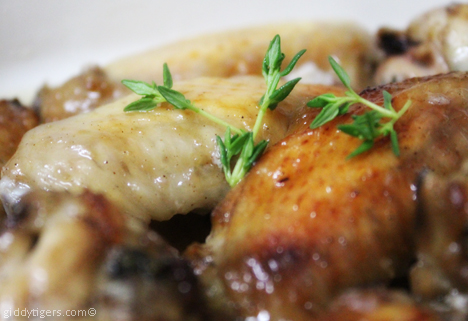
I drizzled maple syrup over the wings the next morning and oven-baked them.  Here’s the result…a mildly herby flavored dish which I felt went really well with steamed rice.

thymechicken1

My husband and son begged to differ though.  The bigger guy said he didn’t like the smell of thyme and the little guy said, “Mommy, something’s wrong with my rice today.”  My daughter and I, however, loved it.  Well…maybe this dish appeals only to females? 🙂

Maple Lemon & Thyme Oven-Baked Chicken

Ingredients:

  • 5 chicken wings, cut into 2 parts each: wings & drummets ( you can also substitute with 2 whole chicken legs, cut into 4 pieces each)
  • 1 tsp of fresh thyme leaves
  • 1 tsp of lemon zest
  • 2 tsp of lemon juice
  • 1 tsp of All Spice powder
  • Dash of black pepper
  • ½ tsp salt
  • 2-3 tbps maple syrup

Method:

thymechicken3

  1. Mix chicken with all ingredients except the maple syrup.
  2. Marinade for at least 1-2 hours.
  3. Preheat oven at 180°C.
  4. Drizzle maple syrup on marinaded chicken and mix well.
  5. Place chicken on baking dish and bake for about 25-30 minutes, or until golden brown.
  6. Serve hot with steamed rice.

thymechicken2

Posted in Drooling & Cooking | Tagged , | Leave a comment

Oooopsie!!!

What do you do if you are caught in your birthday suit, while having lunch in a restaurant?

…Why, I’d smile of course…!

caught1

Continue reading

Posted in Thoughts & Scribblings | Tagged | 3 Comments